Allergy Friendly Lemonade Cake

Allergy-Friendly Lemonade Cake
Makes 12 ample servings
Free of: gluten and all top allergens
Tart, sweet and the perfect finish to a summer meal, get ready to fall in love with this old-fashioned cake. It can be made a day in advance and lasts for several days, covered at room temperature, but good luck keeping it around that long!
Ingredients
¼ cup frozen lemonade concentrate, thawed
½ cup plain rice milk
¼ cup + 2 tbsp vanilla vegan yogurt (I like So Delicious coconut milk yogurt)
1½ tsp apple cider vinegar
1 tsp lemon zest
2¼ cups Authentic Foods GF Classical Blend or my Basic Gluten-Free Mix
¾ tsp xanthan gum
1⅛ tsp double-acting baking powder
1⅛ tsp baking soda
1⅛ tsp salt
1 cup + 2 tbsp sugar
½ cup + 1 tbsp dairy-free soy-free shortening
2¼ tsp vanilla extract
3½ tsp Ener-G Egg Replacer mixed with 4½ tbsp plain rice milk
1 recipe Lemonade Buttercream Frosting (recipe follows)
Method
1. Preheat oven to 350°F. Generously grease a 9×13-inch pan with shortening.
2. Combine lemonade concentrate, rice milk, yogurt and vinegar in a small bowl. Add zest, and set aside.
3. Measure flour mix by spooning flour into a dry measuring cup, then leveling it off with a straightedge. Whisk flour mix with xanthan gum, baking powder, baking soda and salt in a medium bowl. Set aside.
4. Add sugar and shortening to the bowl of a stand mixer fitted with the paddle attachment. Mix on medium speed for 2 minutes. Add vanilla and egg replacer mixture. Mix on medium speed 1 minute more.
5. Sift the flour mixture into the bowl of the stand mixer in three batches, alternating with the lemonade mixture, mixing after each addition to combine. Transfer batter to the prepared pan, and use an offset spatula to even out.
7. Bake in center of oven 20 minutes until the cake is starting to pull away from sides of pan, top is a lovely golden color, and a skewer or toothpick inserted into the cake comes out clean.
8. Let cool completely in pan on a cooling rack. Spread with frosting using an offset spatula.
Lemonade Buttercream Frosting
Makes enough to frost one 9×13-inch cake
Free of: gluten and all top allergens
¾ cup dairy-free soy-free shortening
Pinch of salt
¾ pound confectioners’ sugar (2¼ cup + 3 tbsp)
¼ cup frozen lemonade concentrate, thawed
¾ tsp vanilla extract
¾ tsp lemon zest
1. In the bowl of a stand mixer fitted with the paddle attachment, cream shortening and salt on medium speed for 2 minutes.
2. Add sugar in three batches, beating after each addition. It will be crumbly. Add lemonade concentrate, vanilla and zest. Beat on medium speed until smooth and fluffy, about 3 minutes.
Allergy-Friendly Lemonade Cake © 2013 by Cybele Pascal
This recipe first appeared in the Summer 2013 issue of Allergic Living Magazine
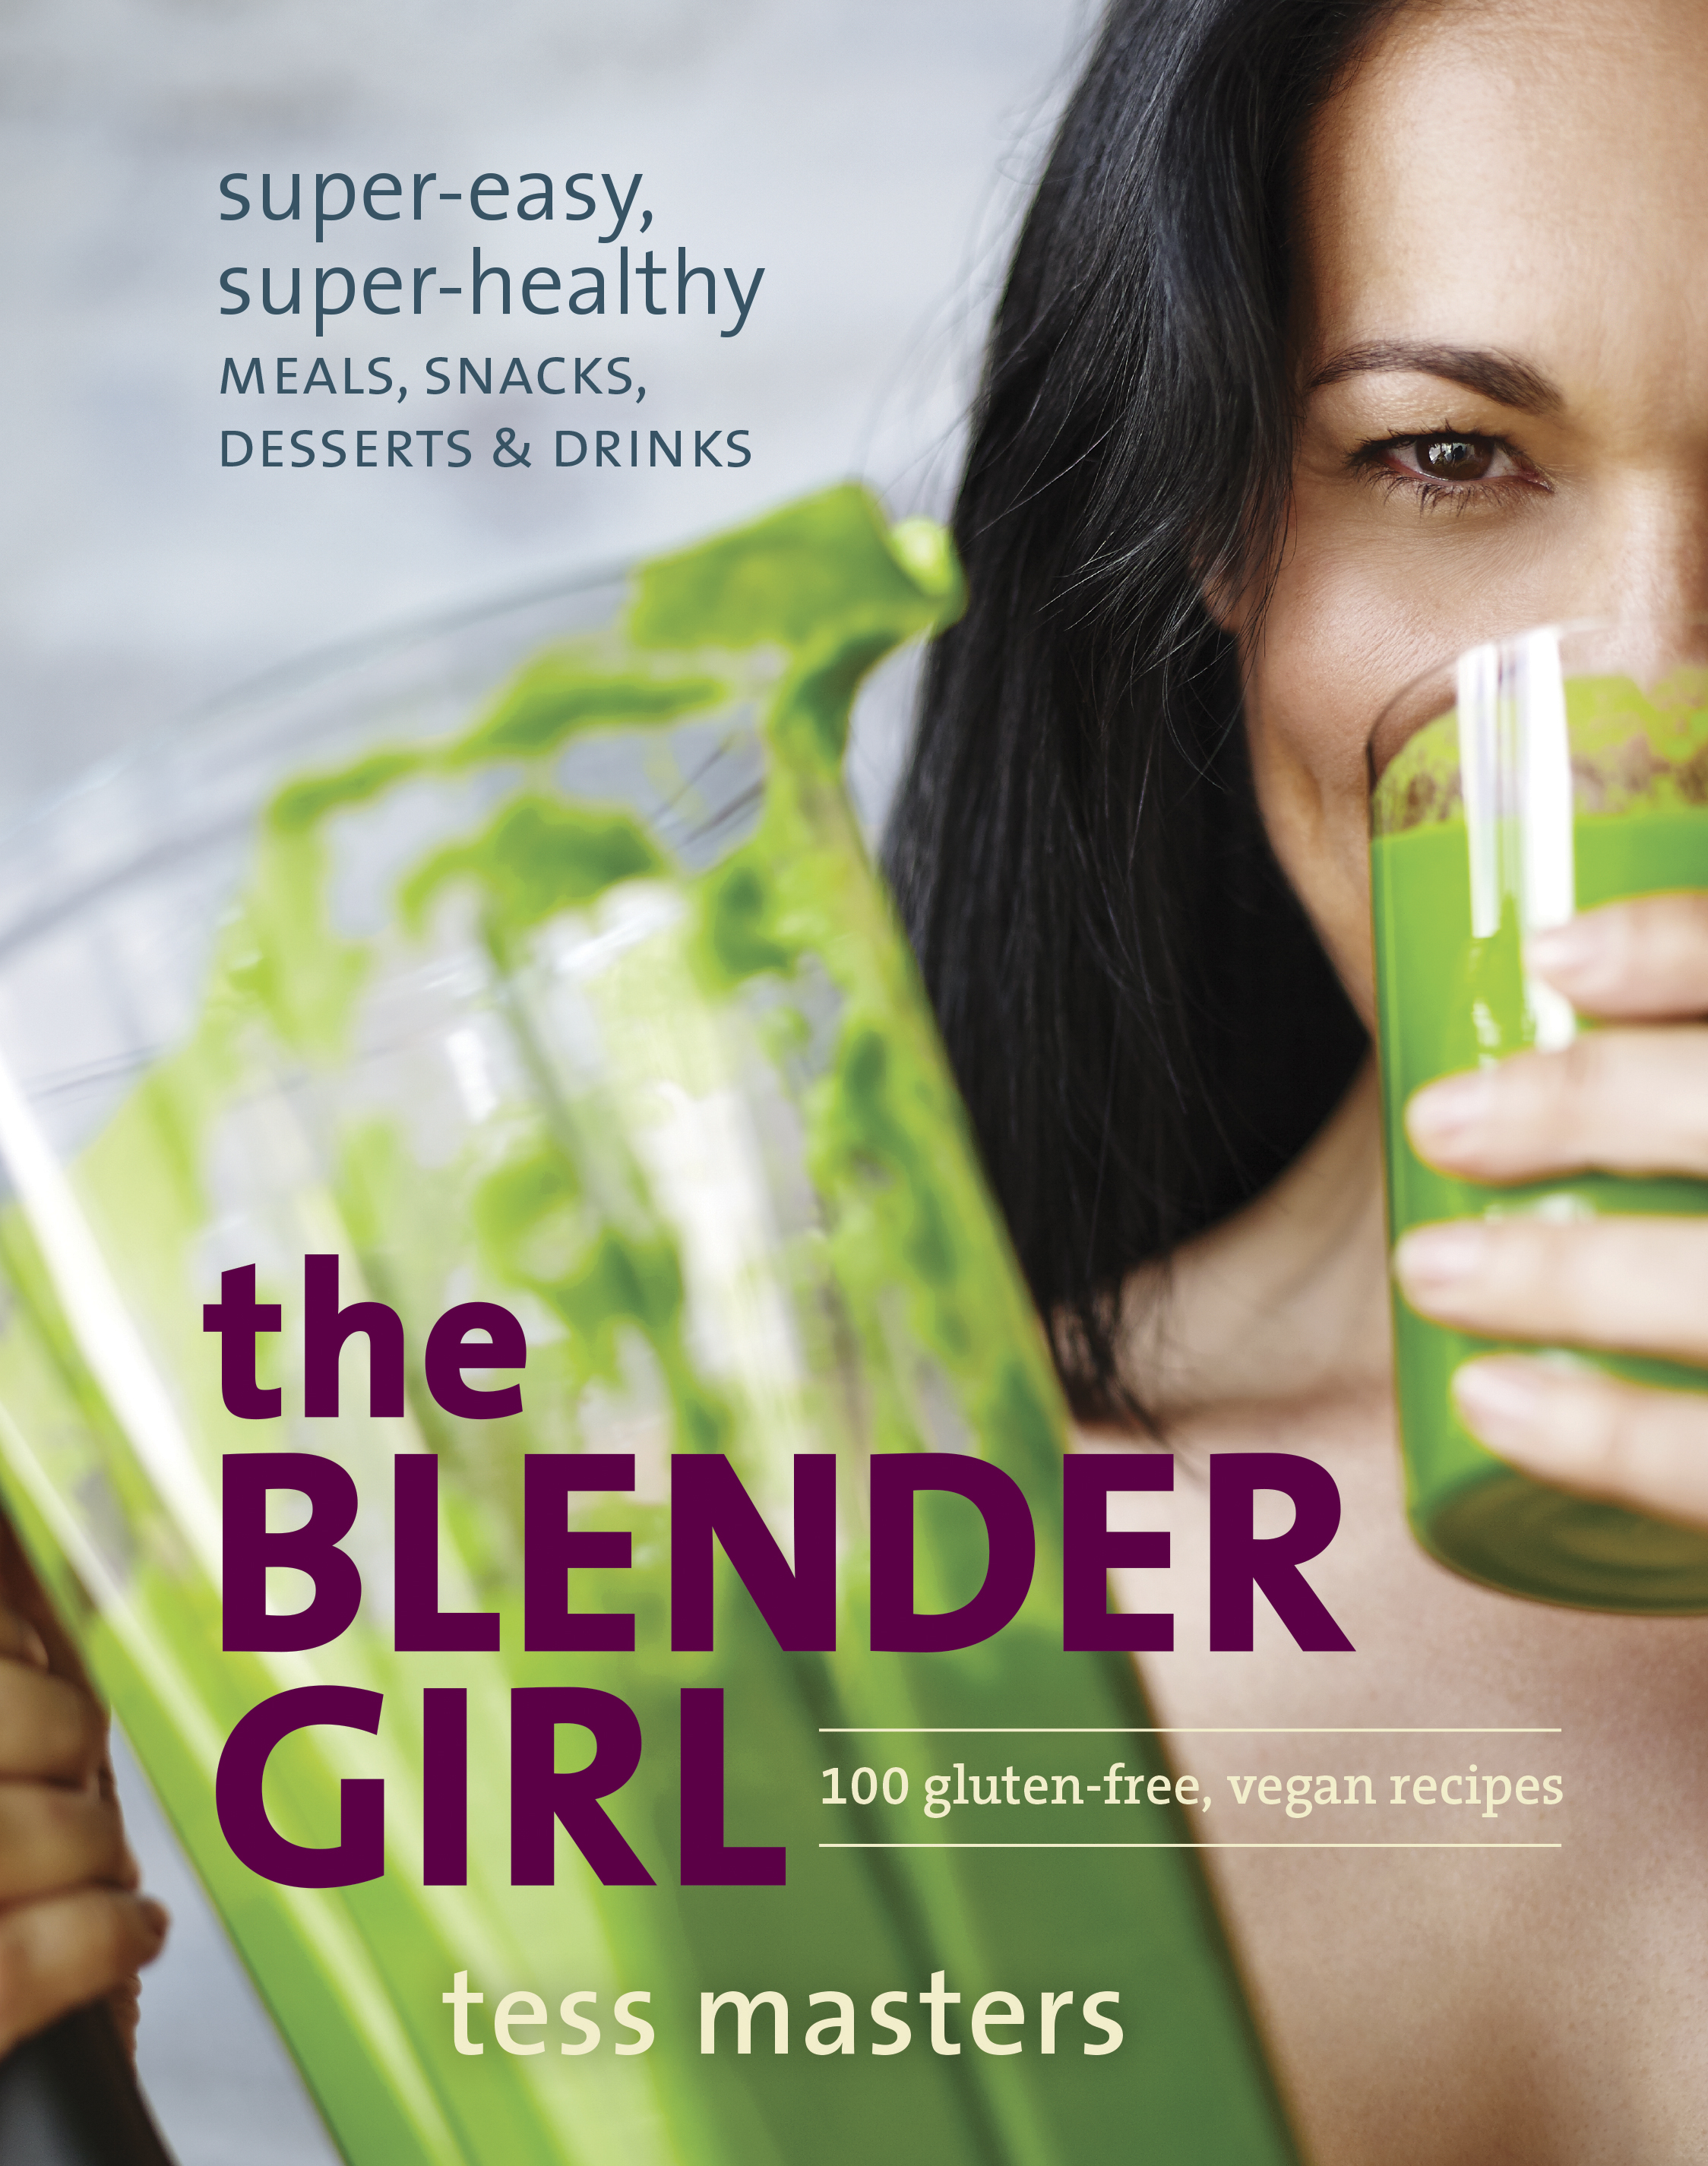
The Blender Girl by Tess Masters
antioxidant avenger
Tess Masters (aka, The Blender Girl) has just published her much anticipated debut cookbook, The Blender Girl: Super-Easy, Super-Healthy Meals, Snacks, Desserts & Drinks, and it’s a beauty. This is one colorful collection of 100 gluten-free, vegan recipes that all incorporate the use of a blender. And so, it should come as no surprise, that Tess’s philosophy of life is all about blending. “Blended” is a metaphor.
For those of you who have followed Tess’s blog, Healthy Blender Recipes, you already know how dynamic Tess is both in her persona and also her food writing. What I learned from reading her book is how flexible she is on both fronts as well. While she is a self-professed zealot, she is no preacher. For Tess, “the way” is a winding path, and it winds in a different direction for each and every one of us. So, this is not a “Gluten-Free” cookbook, or a “Vegan” cookbook, just a celebration of whole foods and a really great way to coax more fruits and vegetables into your daily diet.
Living in a world of fads and trends, it’s refreshing to have a cookbook author admit that there is no one diet that suits all, or even one diet that suits all of us, all the time. For example, Tess eats a lot of raw foods during the warmer months, but eats more cooked foods during the colder ones.
She puts forward the concept of bio-individuality. And while she makes no secret of the fact that she could “easily live without teeth”, this is not a prescription for others. It would be easy to assume that there would be rigidity to a vegan, gluten-free, (raw foods) cookbook full of recipes all made in a blender, but the opposite is actually true. This book will open your mind to endless new possibilities. I was delighted by the creativity and ingenuity of these recipes. “Optional” is a key word in this book, because whether you add an ingredient or not is up to you. But why wouldn’t you want to add the suggested ingredients, when what Tess has created is so perfect? I’m pretty sure that while Tess herself is not dogmatic or didactic, others will be tempted to make her their guru and follow her teachings to the “T” for Tess.
And speaking of “T” for Tess, one of my greatest takeaways from this book was the revelation that a blender-based diet is defined by the four Fs. It’s fun, fast, flexible, and forgiving.
While it might seem odd to focus so much attention on the prevailing philosophy of this cookbook, I think it’s important to recognize that it’s carving out a new genre. The blender isn’t just for smoothies anymore. It’s become a central kitchen tool in our busy, hectic, and often toxic lives, helping us create nutritionally dense, and delicious meals in a very short amount of time.
The Blender Girl: Super-Easy, Super-Healthy Meals, Snacks, Desserts & Drinks is packed with one healthy mouth-watering recipe after another. All made with natural flavors and sweeteners, all vegan, gluten-free and many raw. Many are also nut-free, soy-free, corn-free and sugar-free.
So what’s in the blender if you’ve excluded all that? A myriad of fantastic flavors melded into all kinds of exotic concoctions.
Highlights of the book are the “Love your Blender” chapter in which I learned more about blenders than I ever knew possible, (I was delighted to realize I own 3 types of blenders!) And yes, I too am smitten with longing for a Vitamix.
I also give a nod to her instructions for dehydrating — and I learned a lot from the soaking and sprouting tips. I also just adored the “Milk it baby!” chapter in which Tess walks readers through making your own vegan milks, of which there are countless varieties.
And here are a few shout outs: hats off to the super gorgeous inventive salads. To the “butters” and jams, to the dips, the smoothies, the chips, the fruit leather, the drinks chapter (love), the condiments and sauces, and of course, the desserts. In particular, the “Key Lime” Pudding, made with the incredibly simple and inventive combo of agave nectar, lemon and lime juice, avocado, bananas, and citrus zest. I loved this recipe because it got me thinking about “dessert” in a totally new way.
Now I will share a couple recipes from the book, which are both free of the Top 8 Allergens. Please note that you do not need a Vitamix to make the recipes in this book. While it may be the dream machine, I don’t have one, and these worked just fine. 🙂
antioxidant avenger
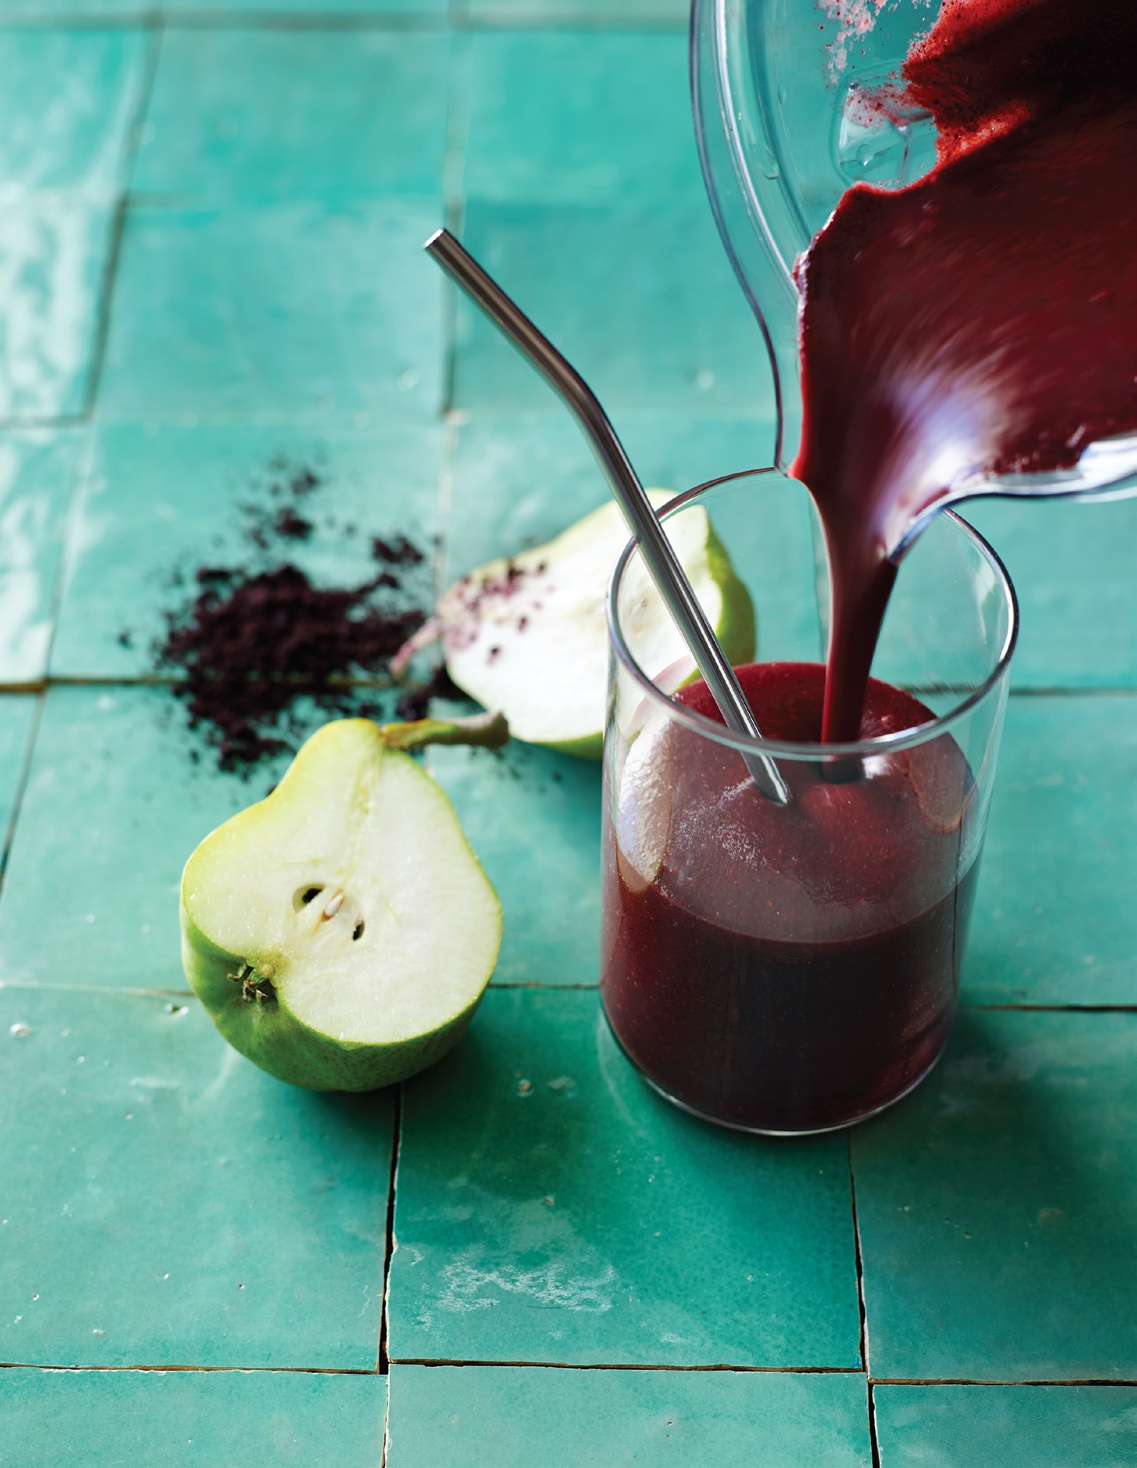
I think of this powerful blend as “field to shield.” With the antioxidant weight of these ingredients, nothin’s gettin’ the better of you! You can enjoy this booster in summer with a little sweetener and omit the trio of orange zest, cinnamon, and ginger. But, these warming spices taste absolutely incredible with the berries, really pull the other flavors together, and elevate this smoothie from good to great. The açaí and maqui are optional but provide an invaluable boost, and I always include them. If you don’t add these superfoods or the spices, you may not need the dates. However you make it, this one’s got your back.
serves 2
1/2 cup (120ml) coconut water
1/2 teaspoon probiotic powder (optional; see note, page 30)
1 packet (3.5 ounces/100g) frozen açaí pulp, or 2 tablespoons dried açaí powder
2 teaspoons maqui powder
2 cups (320g) mixed fresh or frozen berries (1/2 cup each of blueberries, blackberries, raspberries, and strawberries)
1/2 cup (85g) red seedless grapes
1 ripe pear, skin on, cored and diced
1/2 teaspoon minced ginger (optional)
1/4 teaspoon ground cinnamon (optional)
1/2 teaspoon finely grated
orange zest (optional)
1 cup (125g) ice cubes
1 chopped pitted date, soaked,
Throw everything into your blender and puree on high for 30 to 60 seconds, until smooth and creamy. Tweak the sweetness to taste.

watermelon gazpacho is the bomb!
The name says it all. Gazpacho rocks, and this concoction delivers a surprising taste explosion with every spoonful. A happy blend of sweet and spicy, the flavors in this chilled first course or main mellow nicely with time. In fact, the change in flavor is quite pronounced. This is particularly true of the onion. Like a fabulous sangria (see page 174), this soup is better the next day. But, it’s delicious a few hours after preparing, so don’t feel like you have to wait beyond the three-hour chill.
serves 8 as a starter, 6 as a main
4 cups (640g) roughly chopped seedless watermelon, plus 6 cups (960g) diced
2 cups (300g) diced tomato
1 cup (145g) peeled, seeded, and diced cucumber
1/2 cup (70g) diced red bell pepper
2 tablespoons diced red onion, plus more to taste
3 tablespoons finely chopped basil
3 tablespoons finely chopped mint
3 tablespoons freshly squeezed lime juice, plus more to taste
1 teaspoon finely grated lime zest
2 teaspoons minced ginger
1/2 teaspoon minced green serrano chile, plus more to taste
1/2 tablespoon natural salt, plus more to taste
Pinch of freshly ground black pepper
Put the 4 cups of chopped watermelon into your blender and puree on high for 30 to 60 seconds, until liquefied. Pour into a serving bowl. Add the 6 cups of diced watermelon and all the remaining ingredients. Stir to combine well. Tweak flavors to taste (you may want more onion, lime juice, chile, or salt).
Cover and chill in the fridge for at least 3 hours, but preferably 12 to 24 hours to allow the flavors to fuse and the vibrant red color to develop. Before serving, tweak flavors again (if it’s too spicy, add some lime juice). Pass additional lime juice and salt at the table.
Recipes reprinted with permission from The Blender Girl: Super-Easy, Super-Healthy Meals, Snacks, Desserts, and Drinks–100 Gluten-Free, Vegan Recipes! by Tess Masters, copyright © 2014. Published by Ten Speed Press, a division of Random House, Inc.
Photo Credit: Photo taken by Anson Smart © 2014
Allergy Free Cornbread
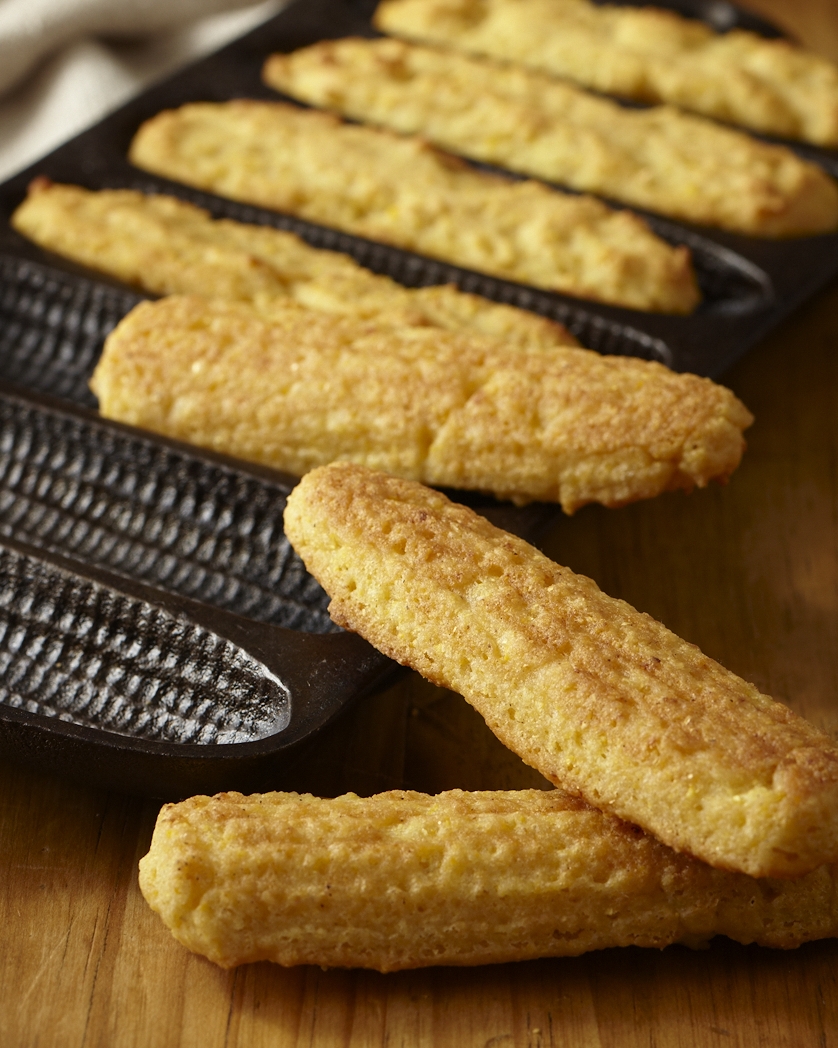
As promised, here is my new and improved Allergy-Free Cornbread recipe. Serve on its own, or use it for my Allergy-Free Cornbread and Wild Mushroom Stuffing recipe. This Gluten-Free, Top 8 Allergen-Free, and Vegan recipe is a revision of my Cornbread Sticks recipe from The Allergen-Free Baker’s Handbook. I’ve altered it to be made with more readily available ingredients: Canola Oil in place of Spectrum Organic Palm Shortening, and King Arthur Gluten-Free Multi-Purpose Flour can be used instead of my Basic Gluten-Free Flour Mix or Authentic Foods GF Classical Blend. For this recipe, you can use either an 8-inch cast iron skillet (see below), or 2 cornstick pans, or an 8 x 8-inch square pan.
Allergy-Free Cornbread
1 cup rice milk
1 tablespoon freshly squeezed lemon juice
1 cup yellow cornmeal
1 cup King Arthur GF Multi-Purpose Flour, or my Basic Gluten-Free Flour Mix or Authentic Foods GF Classical Blend (this will make for BEST texture but any are fine!)
1/4 cup granulated sugar
1/2 teaspoon xanthan gum
1 tablespoon double-acting baking powder
1 teaspoon salt
1 1/2 teaspoons Ener-G egg replacer mixed with 2 tablespoons rice milk
1/3 cup canola oil
1. Preheat oven to 425°F. Preheat pan.
2. Combine rice milk with lemon juice. Set aside.
3. Whisk together cornmeal, flour mix, sugar, xanthan gum, baking powder, and salt in a large bowl.
4. Add the rice milk to the mixture and stir to combine. Add the egg replacer and the canola oil, and stir a few times until smooth. Remove the heated pan(s) from the oven, and grease liberally with baking spray or oil. Fill pan with batter, smooth surface, and bake about 25 minutes, until golden.
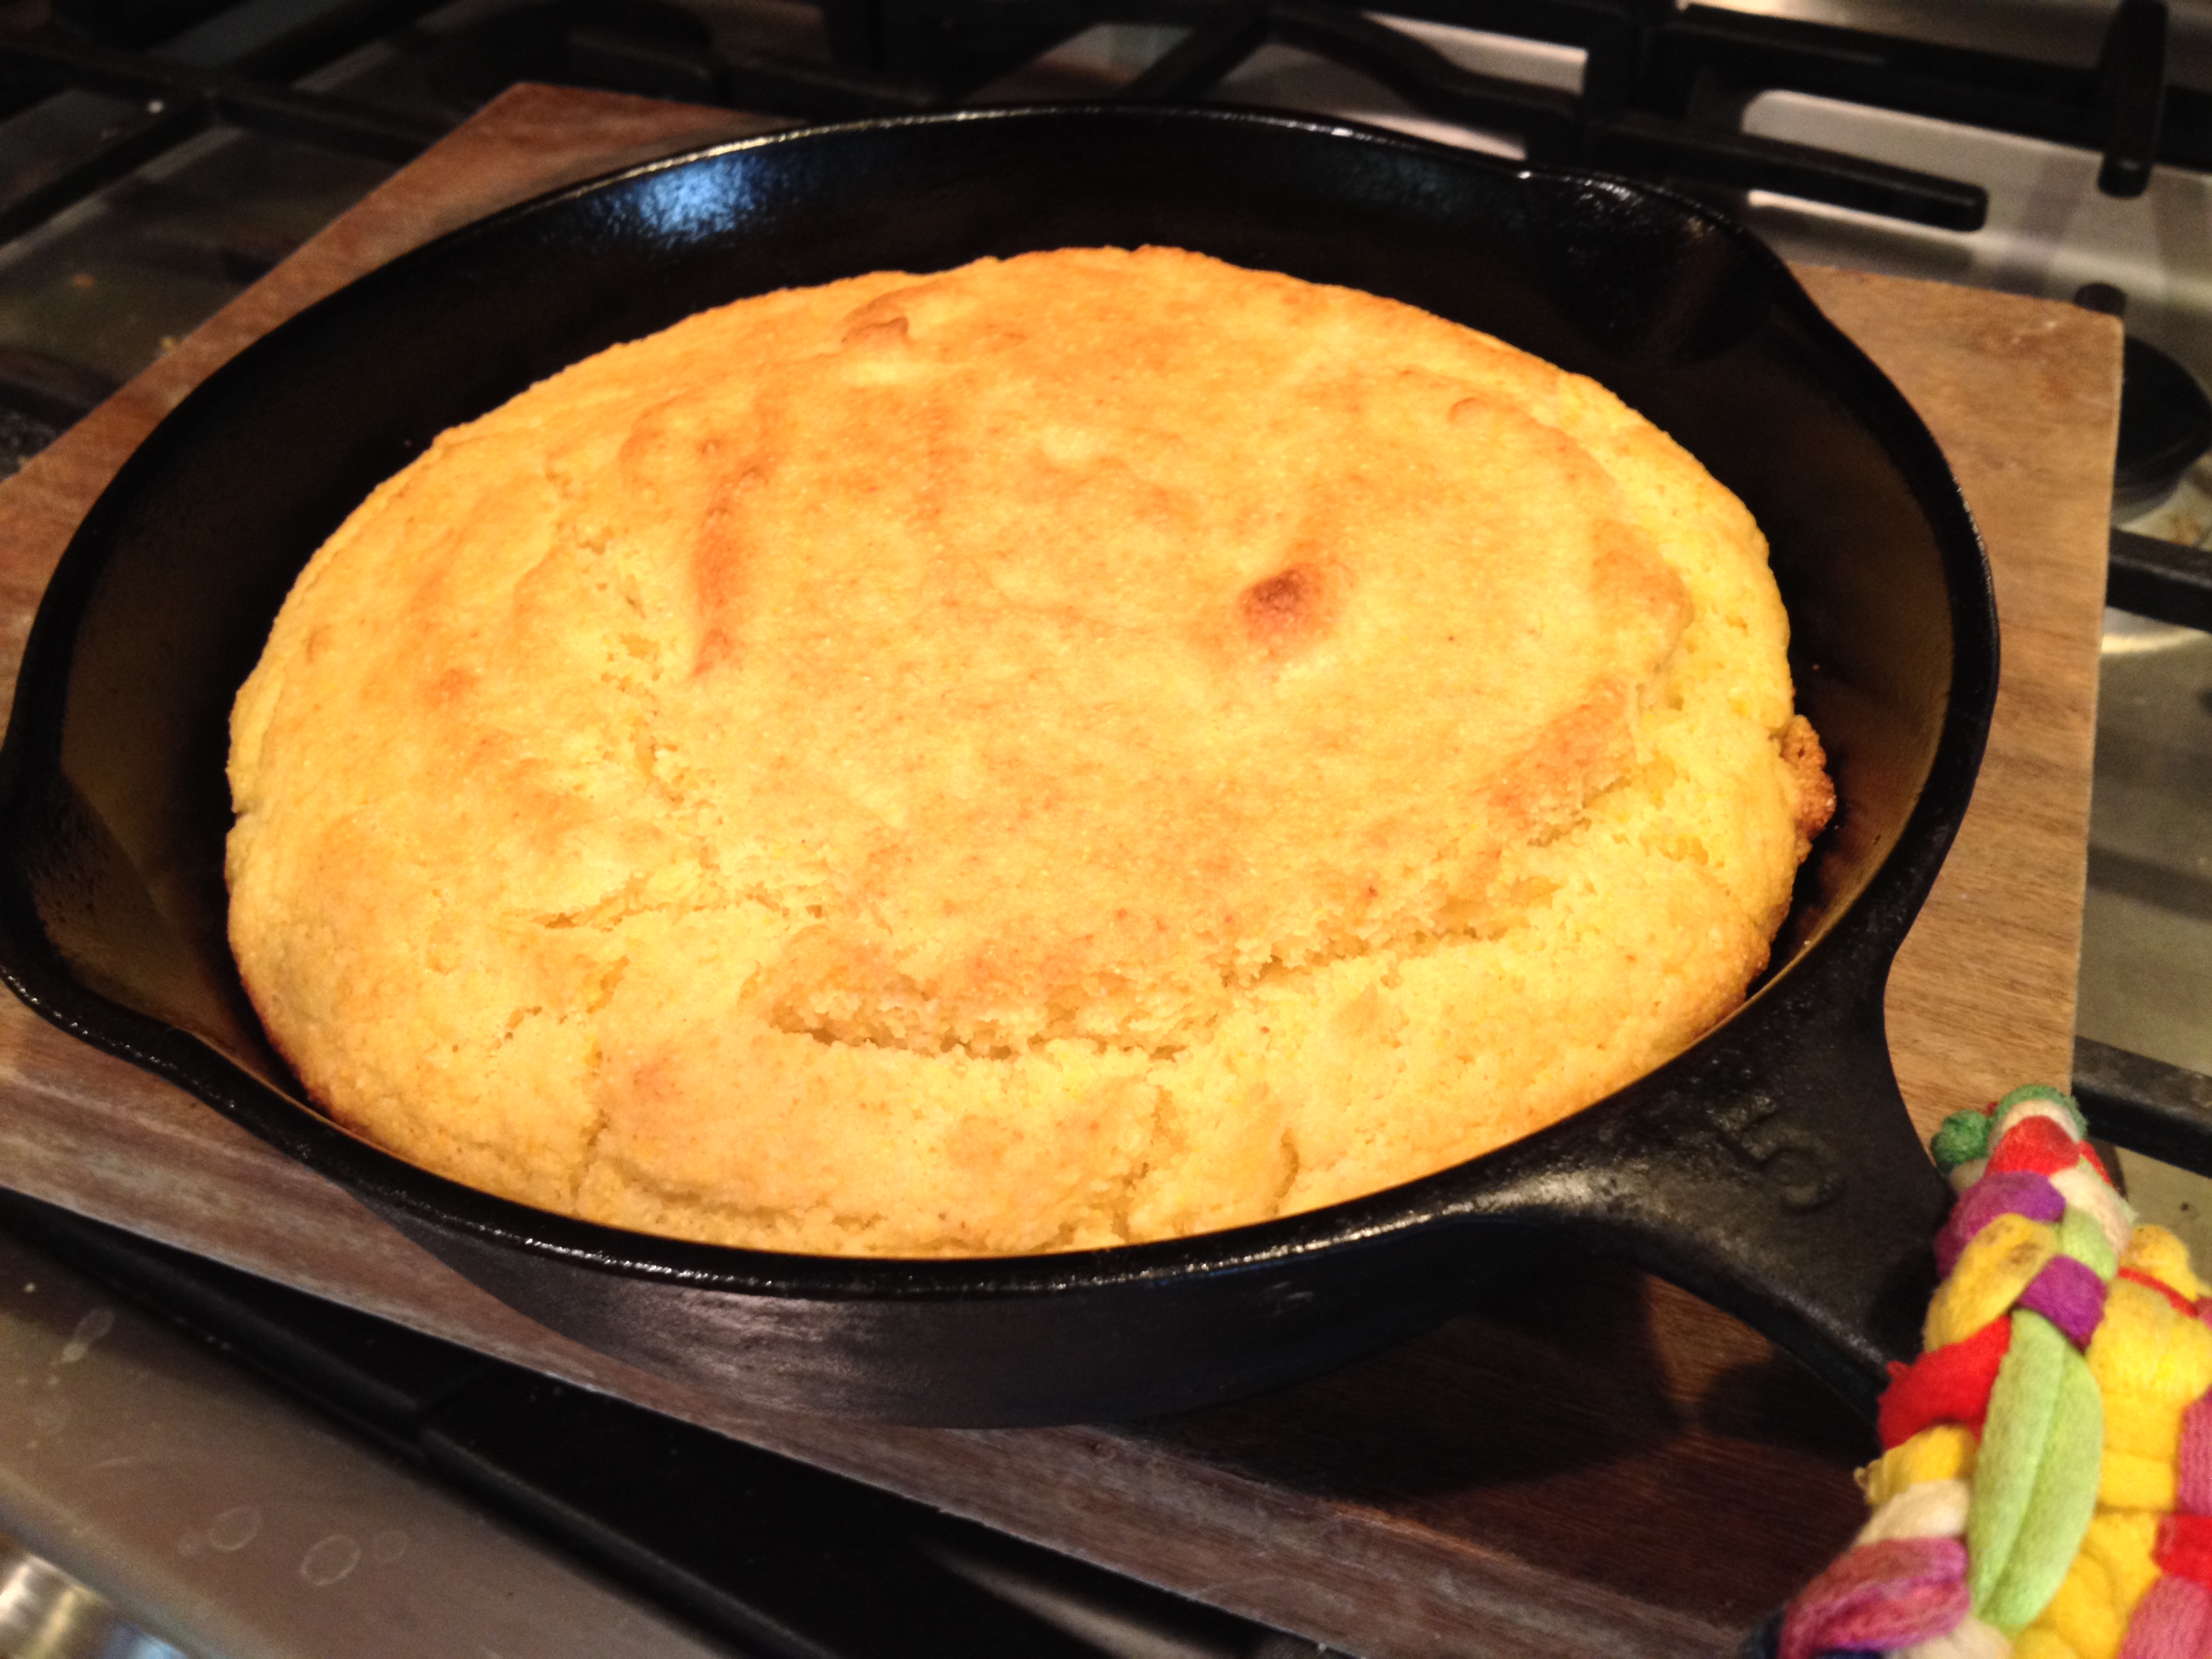
Allergy-Free Cornbread Copyright © 2013 by Cybele Pascal. Cornsticks photo credit: Chugrad McAndrews.